
No Designer, No Problem: How to Make Store-Quality Images With AI (Airbrush AI vs Magnific, Bench-Tested)

Affiliate note: Some links in this article are affiliate links. ClankerCart/Hardball HQ LLC may earn a commission if you buy through them, at no extra cost to you. Our bench scores and opinions remain independent. You can read our full affiliate disclosure.
If you run a quilt shop, a woodworking bench, a newsletter, or a small online store, you already know the problem: the work may be excellent, but the pictures look like they were taken during an earthquake.
AI image tools can help. In plain English, they either make a new image from your description or improve an image you already have.
Think of upscaling like enlarging a small photograph at the copy shop. The picture gets bigger and cleaner, but the machine is mostly working with what is already there.
Generative detail is more like sending the photograph back to the workshop for re-machining. The tool studies the image, then invents believable fabric weave, wood grain, skin texture, shadows, and other details that were missing. That can look terrific. It can also add a surprise thumb where no thumb was invited.
We put two tools through the same practical jobs:
- A blog header
- A blurry phone photo of a handmade product
- A social post graphic
- A book or product cover
The easiest starting point is first.
Aisle 3: Airbrush AI, The Friendly Spray Booth
Best for: Making fresh images quickly, cheaply, and without learning a design program.
Official bench score: 4.3/5, 86/100
Airbrush is the practical on-ramp for people who want one tool that does a bit of everything. Describe the image you need, choose a style, and it produces several options without asking you to understand a control panel that looks like a submarine.
It can create:
- Photorealistic images
- 3D-style renders
- Retro comic artwork
- Vector-style graphics
- Blog covers
- Social media visuals
- Product mockups
- Simple illustrations
Airbrush also includes an image upscaler, image-to-text tools, and a searchable history or asset vault, so your previous work does not vanish into the digital junk drawer.
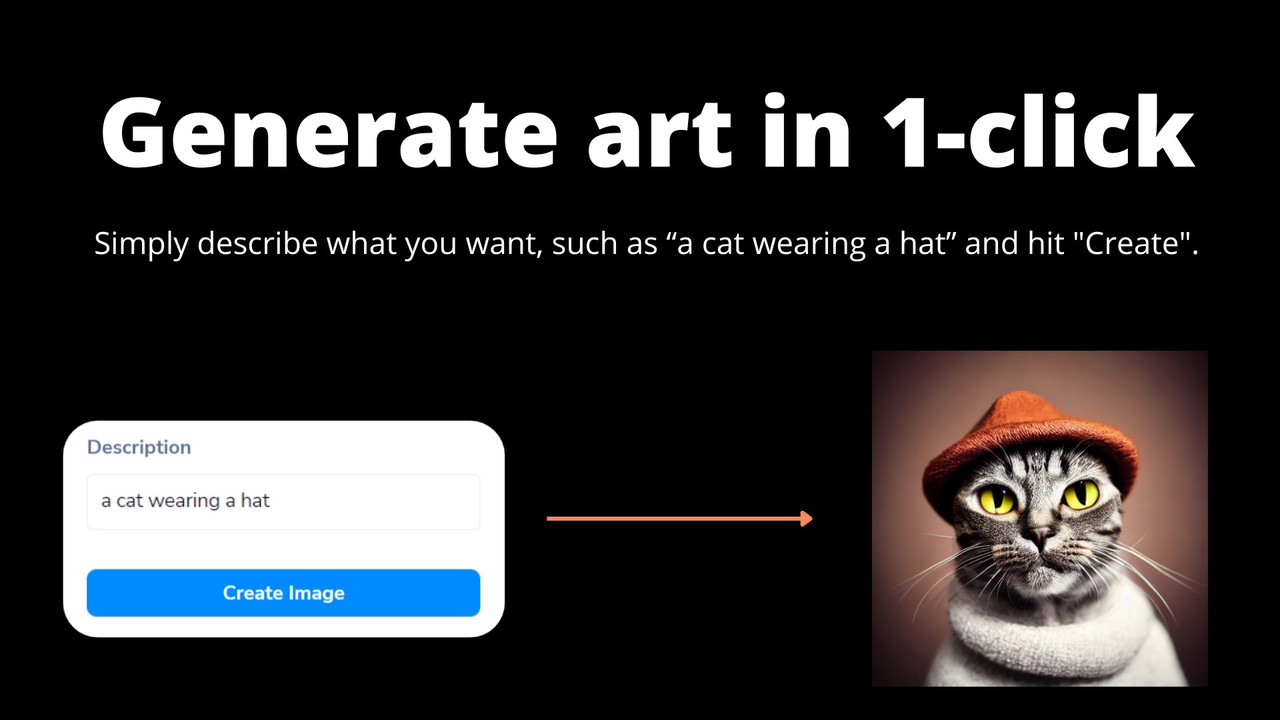
What happened on the bench?
For a blog header, Airbrush is the smoothest fit. Give it a subject, mood, colors, and a little breathing room for your headline. It can generate four distinct treatments in roughly fifteen seconds, which is much faster than scrolling through stock libraries hoping to find “friendly craft business owner near tasteful fabric.”
For a social post graphic, it is equally handy. You can create a consistent visual style instead of using the same three stock photos everyone else has already posted.
For a book or product cover, Airbrush can create the background artwork and enlarge it for use online or in print. Keep the title and author text separate, though. AI-generated lettering still has a habit of turning “Handmade” into something that looks like a sleepy license plate.
For a blurry product photo, Airbrush can sharpen and enlarge the image. It is useful when the original is merely small or soft. It is not the tool we would reach for when a photograph is badly pixelated and needs missing texture rebuilt from scratch. That is Magnific’s counter.
Cost and the catch
The easiest current Airbrush deal is an AppSumo lifetime purchase starting at $29 one time for 500 image credits per month. Around $58 gets 1,000 monthly credits, and around $87 gets 1,500. You can stack up to 10 codes.
There is a 60-day money-back guarantee, but your code must be redeemed within 60 days of purchase. This is a one-purchase option rather than another monthly meter to remember.
You can inspect the Airbrush deal here. Again, ClankerCart/Hardball HQ LLC may earn a commission if you purchase through that link, at no extra cost to you.
The drawbacks are straightforward. Complex prompts involving hands and fingers can still produce anatomical oddities. Also, our impression, not an official bench score, is that Midjourney reaches deeper photographic nuance for purists. Airbrush, however, is considerably easier to operate.
Shop-floor verdict: Airbrush is the dependable spray booth for a solo creator who needs a good-looking image today, not a six-week evening course in visual machinery.
Read our full Airbrush inspection.
Aisle 3, Back Counter: Magnific AI, The Detail Re-Machining Shop
Best for: Rescuing an existing image that looks rough, tiny, blurry, or unfit for print.
Official bench score: 4.5/5, 91/100
Magnific is the heavier machine. It does not simply stretch a small image until the pixels begin waving a white flag. It can invent convincing detail: fabric weave, wood grain, skin pores, hair, reflections, and texture.
That makes it particularly useful when you already have something worth saving.

What happened on the bench?
For a blurry phone photo of a handmade item, Magnific is the stronger choice. A soft photograph of a carved bowl, knitted hat, handmade toy, or vintage object can come out looking far more presentable after enhancement.
But there is an important warning: Magnific may improve the picture by inventing detail. If the grain of your actual wooden product matters, inspect the result closely. You want a sharper presentation of your product, not a subtly different product wearing your product’s jacket.
For a book cover or large banner, Magnific has more muscle. It can produce print-ready 4K and 8K-style output, making it better suited to artwork that needs to hold together at a larger size.
Its creativity and hallucination controls let you decide how faithful the result should be. Keep the creativity setting restrained when you are restoring a real object. Turn it up only when you want a more artistic reinterpretation.
Magnific also offers relighting and style-transfer controls. A flat illustration can receive more atmosphere, or an old low-resolution image can gain enough clarity to become useful again.
Cost and the catch
Magnific is a subscription, not a one-time purchase. The lower prices require annual prepayment:
- Premium: about $14.50 per month, billed annually, with 240,000 credits per year
- Premium+: about $33.75 per month, billed annually, with 600,000 credits per year and unlimited generations on selected models
- Pro Starter: about $82.50 per month, billed annually
The exact plan details can change, so check the Magnific plans before subscribing. That link is also an affiliate link, meaning ClankerCart/Hardball HQ LLC may earn a commission at no extra cost to you.
The main friction is the credit meter. Heavy enhancement burns credits quickly, especially when you are experimenting. Push the creativity slider too far and you may get extra eyes, odd objects, or a face that has wandered in from another family entirely. Expect to discard a render occasionally and try again.
Shop-floor verdict: Magnific is the heavy-duty repair bench. Use it when the image already exists but needs serious cleanup, enlargement, or print preparation.
Read our full Magnific inspection.
The Quick Aisle Sign: Which Tool Fits Which Job?
| Job on the work order | Best tool | Why |
|---|---|---|
| Straight-up new images | Airbrush | Easier, faster, and better for generating batches |
| Blog headers | Airbrush | Multiple styles and quick variations |
| Social post graphics | Airbrush | Low-cost visual volume without a design degree |
| Rescuing a fuzzy existing photo | Magnific | Rebuilds texture instead of simply stretching pixels |
| Print-ready enlargement | Magnific | More control and higher-resolution output |
| Book or product cover artwork | Magnific for the hero art; Airbrush for ideas | Magnific handles detail; Airbrush helps you explore options |
| Both kinds of work | Airbrush plus Magnific | Airbrush for volume, Magnific for the one image that has to shine |
The Five-Step Beginner Workflow
You can follow this workflow this afternoon.
1. Describe the job, not the machinery
Say what the image is for and what should be visible.
Try: “A warm blog header for a quilt shop, folded blue and orange quilts on a wooden worktable, morning window light, empty space on the left for a headline.”
You do not need special prompt language. Write like you are explaining the job to a helpful sign painter.
2. Generate a small batch
Do not spend twenty minutes polishing one description before you see anything. Create several options and compare them.
Airbrush is especially useful here because it produces multiple treatments quickly.
3. Pick the least-weird one
Do not automatically choose the most dramatic image. Choose the one with the cleanest hands, most sensible objects, and most useful composition.
A calm, believable image usually sells your work better than a spectacular picture with seven fingers.
4. Upscale or enlarge it
Use Airbrush’s upscaler for normal web graphics and practical enlargements.
Use Magnific when the source is especially rough, the image must be printed large, or you want more texture rebuilt into the result.
5. Inspect hands, faces, and text
Zoom in before publishing. Check fingers, tools, jewelry, glasses, logos, signs, and lettering.
The final inspection is still your job. The robot is quick, but it does not know when it has made a wrench with three handles.
The Honest Friction: Where AI Images Still Misbehave
AI images are useful helpers, not reliable product photographers.
They can still get these things wrong:
- Hands and fingers
- Small objects and tool handles
- Lettering on signs
- Logos and brand marks
- Exact product details
- Facial identity
- Anything meant to depict a specific real person
Do not use an AI-generated image as a photograph of your actual product unless it is clearly presented as an illustration or concept. If a customer orders a blue quilt and receives a quilt that looks nothing like the picture, the image tool has not saved you time. It has built a customer-service repair job.
For real products, use your own photograph and improve it carefully. Even then, compare the enhanced version with the original to make sure the tool has not changed the shape, color, texture, or important features.
Before selling merchandise with an AI-made image, check the vendor’s current commercial-use and merchandise terms. Airbrush and Magnific describe commercial-use permissions, but plans, tools, and licensing rules can change. Read the terms attached to the plan you are actually buying.
Short FAQ
Is Airbrush or Magnific better for beginners?
Airbrush. It is simpler, cheaper to start, and better for making fresh images in batches.
Can Magnific fix a genuinely blurry product photo?
It can improve a rough photo, but it may invent detail. Treat the result as an enhanced presentation, not unquestionable evidence of what the real product looks like.
Do I need to know how to write prompts?
No. Start by describing the subject, setting, style, colors, and purpose. Plain English is enough.
Can I put AI images on products I sell?
Possibly, but check the commercial-use and merchandise terms for your current plan before printing or selling anything. Also avoid logos, recognizable people, and copied brand styles.
The short version: start with Airbrush if you need a friendly all-purpose image counter. Reach for Magnific when an existing image needs a serious rescue or print-ready enlargement. If you use both, let the easy machine handle the volume and save the heavy machinery for the hero shot.
Affiliate reminder: ClankerCart/Hardball HQ LLC may earn a commission from purchases made through the Airbrush and Magnific links in this article, at no extra cost to the reader. That relationship does not determine our ratings or recommendations.
Written by Penny